
Coastal Charm: Rustic Driftwood Branch Chandelier
So, you’re wondering about those cool, rustic driftwood branch chandeliers, huh? Well, the gist is they’re essentially light fixtures crafted from pieces of natural driftwood, often branches, arranged to hold bulbs or other light sources. They bring a unique, organic, and truly coastal vibe to any space, effortlessly blending natural beauty with functional lighting. Think less mass-produced and more “found art” for your ceiling. They’re a fantastic way to introduce a touch of the outdoors and a serene, almost beach-house feel, whether you live by the ocean or just dream of it.
There’s something inherently captivating about driftwood. Each piece tells a story, shaped by the ebb and flow of the tides, bleached by the sun, and smoothed by sand. It’s this natural artistry that makes it such a compelling material for home decor, especially for something as central as a chandelier Mezohome.
What Makes Driftwood Special?
Beyond its aesthetic appeal, driftwood possesses several properties that make it ideal for crafting.
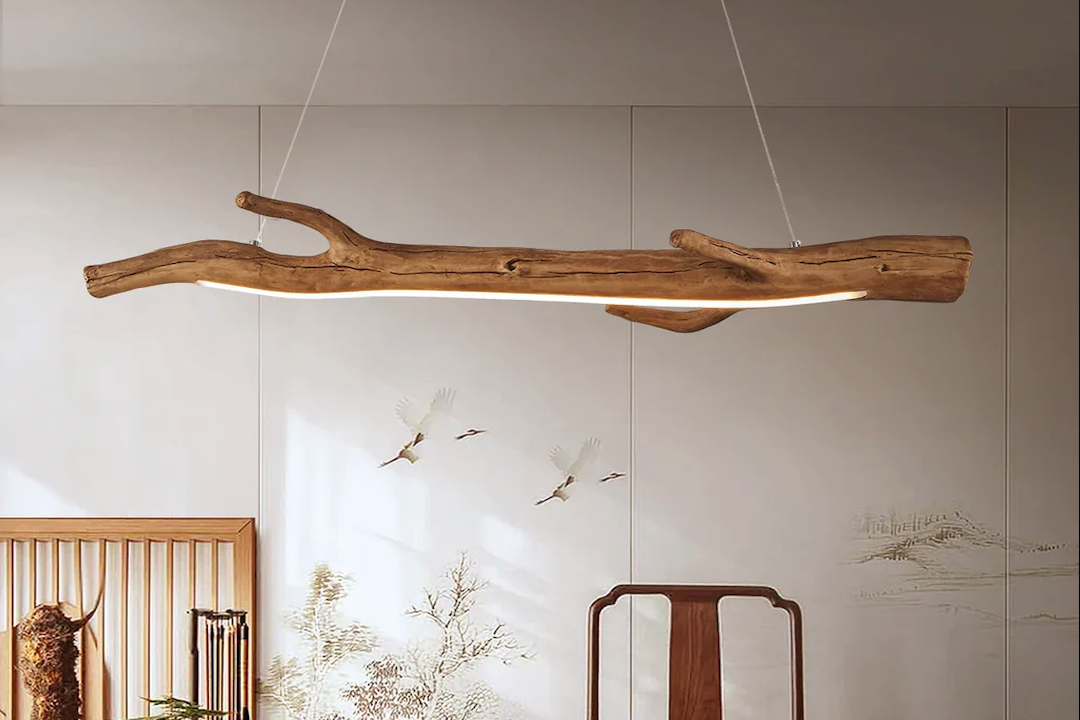
- Unique Textures and Shapes: No two pieces of driftwood are alike. Some are gnarled and twisted, others long and slender, still others wide and worn. This natural variation is what gives each chandelier its singular character.
- Natural Durability: Having been exposed to the elements, driftwood is often incredibly resilient. It’s been seasoned by nature, making it less prone to warping or cracking than fresh wood, provided it’s properly dried and treated.
- Eco-Friendly Material: Using driftwood is a sustainable choice. You’re repurposing material that has naturally washed ashore, rather than sourcing newly cut timber. It’s a way to bring natural elements into your home without contributing to deforestation.
- Lightweight Options: While some large pieces can be heavy, many driftwood branches are surprisingly light, especially after extensive drying, making them manageable for ceiling fixtures.
The Coastal Connection
Driftwood chandeliers are practically synonymous with coastal decor. They evoke images of serene beaches, salty air, and the calming sound of waves.
- Beach House Aesthetic: They fit seamlessly into a beach house, cottage, or any home aiming for a relaxed, seaside ambiance.
- Bringing the Outdoors In: Even if you’re miles from the nearest ocean, a driftwood chandelier can transport you there, creating a sense of natural tranquility within your living space.
- Versatile Styling: While distinctly coastal, driftwood can also complement bohemian, rustic, or even minimalist interiors by adding an organic, artisanal touch.
Crafting Your Own: The DIY Approach
For those with a knack for hands-on projects, creating your own driftwood branch chandelier can be an incredibly rewarding experience. It allows for complete customization and a truly personal touch.
Sourcing Your Driftwood
This is where the adventure begins! Finding the right pieces of driftwood is crucial.
- Beach Combing: The most obvious source is, of course, the beach. Look for pieces that are well-weathered, dry, and free of excessive debris or strong odors. Remember to check local regulations regarding collecting natural materials from beaches, as some areas have restrictions.
- Online and Local Suppliers: If beachcombing isn’t an option, or if you need specific types of branches, you can find reputable suppliers online or at specialty craft stores. This option often guarantees clean, dried, and already-treated wood.
- Ethical Considerations: Always ensure your driftwood is sourced responsibly. Avoid taking from protected areas or disturbing natural habitats.
Essential Tools and Materials
Before you start assembling, gather your supplies.
- Driftwood Branches: Your star material, cleaned and thoroughly dried.
- Lighting Kits: These can be simple pendant light kits (individual sockets with cords), or a more elaborate multi-bulb wiring harness. Decide on the number of lights you want and the type of bulbs (LEDs are great for energy efficiency and longevity).
- Electrical Wire: If you’re building a custom circuit.
- Wire Strippers: For safely working with electrical wires.
- Screwdrivers and Pliers: For various assembly tasks.
- Drill with Various Bits: To create holes for wiring and mounting.
- Strong Cord or Chain: For hanging the chandelier. Think decorative rope, sisal, or a sturdy metal chain.
- Ceiling Canopy or Junction Box Cover: To cover the electrical box where the chandelier will be wired.
- Wood Glue or Epoxy: For securing joints between branches (optional, depending on design).
- Sandpaper: For smoothing any rough edges.
- Sealer (Optional): A clear, non-toxic sealant to protect the wood and prevent any dust or small particles from shedding.
- Gloves and Safety Glasses: Always prioritize safety when working with tools and electricity.
Design and Assembly Steps
This is the creative part! There’s no single “right” way to do this, as each piece of driftwood dictates its own path.
- Clean and Prepare: Thoroughly clean all driftwood pieces. Scrub off any sand, dirt, or loose bark. Allow them to dry completely, which can take several weeks if they were wet. You might need to bake smaller pieces in a low oven for a few hours (around 200°F or 90°C) to fully sterilize and dry them, but be careful not to scorch the wood.
- Lay Out Your Design: Arrange your branches on a flat surface to visualize the desired shape and how the lights will be integrated. Consider balance and how it will hang.
- Secure the Basic Structure: Use strong cord, screws, or wood glue to connect the main branches that will form the core of your chandelier. This structure needs to be robust enough to support the weight of the lights and itself.
- Integrate the Lighting:
- Drill Holes: Carefully drill holes through the branches where you want to place the light sockets or where wires will pass through. Ensure the holes are appropriately sized.
- Thread Wiring: If using individual pendant light kits, thread the cords through the drilled holes and secure the sockets. If creating a more complex wired system, route the electrical wires through the branches, securing them discreetly.
- Connect Wires: If custom wiring, connect all positive wires together, all negative wires together, and all ground wires together, following standard electrical safety practices. This is often done within a central “spine” branch or a small hidden junction box.
- Test the Circuit: Before final assembly, connect your wiring to a test power source to ensure all lights are working correctly.
- Attach Hanging Mechanism: Securely attach your chosen rope or chain to the main structure of the chandelier. You’ll need at least three sturdy attachment points for balance, converging to a single point for hanging from the ceiling.
- Finishing Touches: Sand any rough edges. Apply a clear, non-toxic sealant if desired to protect the wood and give it a slight sheen.
Safety First: When in Doubt, Call a Pro
Working with electricity can be dangerous if you’re not experienced.
- Electrical Wiring: If you’re not confident in your electrical wiring skills, especially for a multi-bulb setup, it’s highly recommended to consult or hire a qualified electrician. They can ensure your chandelier is wired safely and to code.
- Weight Distribution: Ensure the hanging mechanism and the ceiling attachment point are strong enough to support the full weight of your completed chandelier. Over-engineering for safety is always a good idea.
- Proper Grounding: Make sure all metal components are properly grounded to prevent electrical shock.
- Heat from Bulbs: Choose LED bulbs to minimize heat, which is important when they are in close proximity to wood.
Buying a Pre-Made Driftwood Chandelier
Not everyone has the time, tools, or inclination for a DIY project, and that’s perfectly fine! There are many beautiful, ready-made driftwood chandeliers available.
Where to Find Them
The market for unique, handcrafted items has expanded significantly.
- Etsy and Independent Artisans: This is often the best place to find truly unique, handmade pieces crafted by individual artists. You can often communicate directly with the maker for custom requests.
- Specialty Lighting Stores: Upscale lighting showrooms or those specializing in natural and rustic decor often carry a selection of driftwood chandeliers.
- Home Decor Retailers (Online and Brick-and-Mortar): Larger retailers with a focus on coastal or natural aesthetics might offer mass-produced or semi-handmade versions. Keep an eye on the details to ensure it meets your quality expectations.
- Local Craft Fairs and Markets: If you’re lucky, you might stumble upon a talented local artisan selling these at a market.
What to Look For When Buying
When investing in a pre-made chandelier, consider these factors.
- Quality of Driftwood: Examine photos or the physical piece for well-cleaned, dried, and structurally sound driftwood. Avoid pieces that look brittle, are shedding excessively, or have a strong, lingering odor.
- Construction and Durability: How are the branches joined? Are they securely fastened with discreet screws, strong adhesives, or robust cordage? The overall structure should feel solid and balanced.
- Electrical Certification: For commercially sold chandeliers, look for safety certifications (e.g., UL listed in the US, CE in Europe) to ensure the electrical components meet safety standards.
- Wiring Integration: Check how the wiring is integrated. Is it neatly hidden or tastefully exposed? Are the sockets securely mounted?
- Hanging Mechanism: Is the chain or rope sturdy and appropriate for the size and weight of the chandelier? Does it come with a ceiling canopy?
- Size and Weight: Confirm the dimensions (height, width, depth) and approximate weight. This is crucial for planning your installation and ensuring your ceiling can support it.
- Bulb Type and Count: How many bulbs does it accommodate, and what type (Edison, LED, candelabra)? Does it come with bulbs, or do you need to purchase them separately?
- Return Policy and Warranty: Especially for online purchases, understand the seller’s return policy and if any warranty is offered.
Installation and Placement: Making it Shine
Once you have your chandelier, proper installation and strategic placement will make all the difference.
Ceiling Considerations
Before you even think about lifting that beautiful piece, check your ceiling.
- Junction Box and Support: You absolutely must install a chandelier into a ceiling junction box that is specifically rated for supporting light fixtures, and ideally, directly into a ceiling joist or with a ceiling fan rated brace. A standard electrical box in drywall usually isn’t strong enough for anything heavier than a small flush mount.
- Weight Capacity: Know the weight of your chandelier, especially if it’s a large one, and ensure your ceiling’s support can handle it. When in doubt, consult a contractor or electrician.
- Existing Wiring: Make sure the existing wiring in your ceiling is appropriate for the electrical load of the chandelier.
Ideal Locations
Driftwood chandeliers are versatile, but some spots truly highlight their charm.
- Dining Room: Over a dining table, a driftwood chandelier creates a warm, inviting focal point, perfect for intimate dinners or lively gatherings. The height should allow conversation without obstruction.
- Living Room: A large, statement piece in a living room with high ceilings can tie a whole coastal or rustic theme together.
- Entryway/Foyer: Make a grand statement right when guests walk in. Ensure it’s high enough so people don’t bump their heads!
- Bedroom: For a more subdued light, a smaller driftwood chandelier in the bedroom can add to a serene, relaxed atmosphere. Think soft, warmer light bulbs here.
- Covered Outdoor Spaces: In a well-protected, covered patio or porch area that isn’t exposed to direct rain or extreme humidity, a driftwood chandelier can extend your indoor aesthetic to your outdoor living space. Always ensure it’s rated for damp or wet locations if used outdoors.
Height and Positioning
Getting the height right is key for both aesthetics and functionality.
- Dining Tables: Generally, the bottom of the chandelier should be about 30-36 inches (75-90 cm) above the dining table surface. This allows for ample light without blocking views across the table.
- High Ceilings: For rooms with very high ceilings (10 feet/3 meters or more), you can hang the chandelier higher to fill the vertical space. A good rule of thumb is 7 feet (2.1 meters) from the floor to the bottom of the fixture in general walking areas, but this can be adjusted for visual flow.
- Centered: Position the chandelier as close to the center of the room or the focal point (like a dining table) as possible for balanced illumination.
- Visual Impact: Step back and look at the chandelier from different angles. Does it feel balanced? Does it complement the existing decor, or does it overwhelm it? Minor adjustments to chain length can make a big difference.
Maintenance and Longevity
Driftwood is relatively low maintenance, but a little care goes a long way in preserving its beauty.
Keeping it Clean
Light dusting is usually all that’s needed.
- Regular Dusting: Use a soft, dry cloth or a feather duster to gently remove dust from the branches and light fixtures.
- Avoid Harsh Chemicals: Do not use cleaning sprays or chemical cleaners on the driftwood, as these can strip its natural finish or cause discoloration.
- Gentle Brushing (Optional): If there are crevices where dust accumulates, a soft, dry brush (like a paintbrush) can help dislodge it.
Protecting the Wood
While naturally resilient, a little protection can enhance longevity.
- Humidity Control: Extreme fluctuations in humidity can sometimes cause wood to expand or contract. If you live in a very dry climate, a humidifier might help prevent the wood from becoming too brittle. In very humid areas, ensure good ventilation.
- Pest Control (Pre-Treatment): When sourcing driftwood, especially from natural environments, some people opt to bake or treat the wood with insecticides to eliminate any potential pests hidden within. If purchasing, ensure the supplier has already done this.
- Sealers (Optional): As mentioned earlier, a clear, non-toxic sealant can protect the wood, prevent shedding of small fibers, and deepen its natural color slightly. Choose a matte finish if you want to maintain the raw, natural look.
Bulb Replacement
Access to bulbs should be considered during installation.
- Easy Access: When hanging, consider how you’ll reach the bulbs for replacement. Will you need a tall ladder or a specific method to lower the chandelier slightly?
- LED Benefits: Using LED bulbs significantly reduces the frequency of bulb replacement due to their long lifespan, making maintenance much easier.
A driftwood branch chandelier isn’t just a light fixture; it’s a piece of art that tells a story and brings a sense of calm and natural beauty into your home. Whether you craft it yourself or acquire a lovingly made piece, it’s a statement that truly embodies coastal charm.